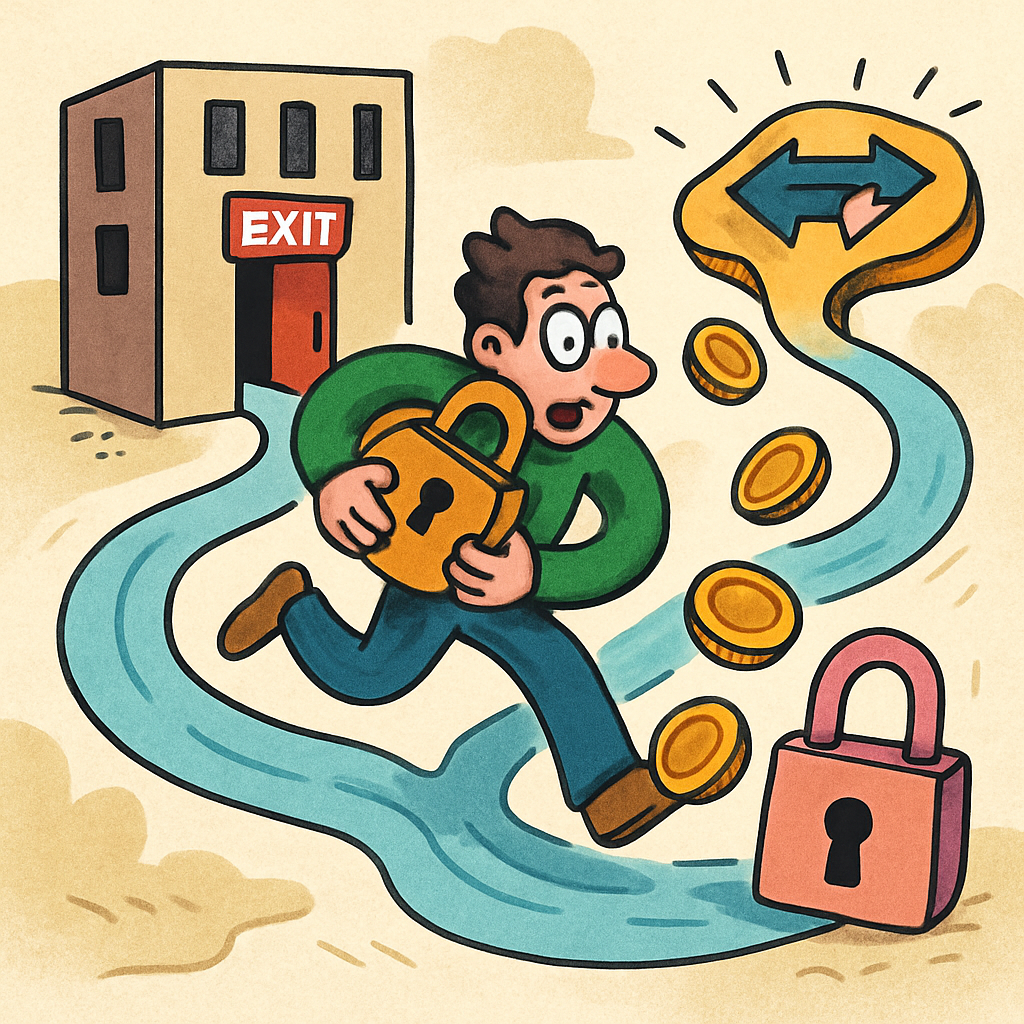
Leaving Centralized Exchanges: Full Self-Custody Guide
Tired of trusting CEXs with your coins? This practical guide shows you exactly how to move to full self-custody and use no-KYC swaps along the way.

| Feature | Centralized Exchange (CEX) | Self-Custody + SwapRocket |
|---|---|---|
| Who holds keys? | Exchange controls private keys | You control wallet keys/seed |
| KYC required? | Almost always | SwapRocket: no account, no KYC swaps |
| Withdrawal limits | Yes, often daily/weekly caps | None (network limits only) |
| Privacy | KYC, linked to identity | Wallet-based, no account needed |
| Asset control during swaps | Funds sit in exchange accounts | Non-custodial; swaps from your own wallet |
| Supported coins | Varies; often 50–300 | SwapRocket: 200+ cryptocurrencies |
| Typical swap time | Minutes to hours, sometimes delays | Minutes, depending on network load |
Maybe it was just for a few hours. Maybe it was days. But that moment – watching your balance on the screen and realizing you couldn’t actually touch it – sticks with you.
That’s the core problem with centralized exchanges (CEXs): your crypto is there… until it isn’t.
In this guide, we’ll walk through how real traders are leaving CEXs, moving into full self-custody, and using non-custodial, no-KYC swap tools like SwapRocket along the way to rebalance, convert (like ETH to USDT or BTC to USDT), and bridge between chains.
TL;DR – Leaving CEXs Without Losing Your Mind
- Not your keys, not your coins: CEXs hold your private keys and can freeze, limit, or lose your funds.
- Full self-custody means you control wallets, keys, and seed phrases – no one can lock you out.
- Step out in phases: test withdrawals, then move larger amounts, then rebalance via no-KYC swaps.
- Use tools like SwapRocket Exchange and the crypto converter to switch assets (e.g., ETH to USDT, BTC to USDT, SOL to USDT) after you’re in your own wallets.
- Backups and network checks matter more than anything – a single mistake can be irreversible.
As of December 17, 2025, no live market data is included here; any prices, rates, or percentages are examples only.
---
Why Crypto Traders Are Leaving Centralized Exchanges
If you’re reading this, chances are you already feel the tension: CEXs are convenient, but they’re also a single point of failure.
Here’s what’s driving people away.
1. Custody risk: your coins are someone else’s liability
On a CEX, you don’t control the private keys to your assets. The exchange does.
That means:
- Your BTC, ETH, SOL, and stablecoins are legally and technically the exchange’s responsibility.
- If they get hacked, go insolvent, or face regulatory trouble, your assets are part of their problem.
- You’re relying on a username, password, and database entry, not cryptographic ownership.
FTX, Celsius, BlockFi – you know the list. Many traders only learned the phrase "not your keys, not your coins" after it was too late.
2. KYC, surveillance, and shrinking privacy
Almost every major CEX now requires full KYC: passport, ID, selfies, sometimes even proof of funds.
For traders who care about:
- Financial privacy
- Personal safety (e.g., not broadcasting high balances tied to real identity)
- Geographic or political risk
…staying entirely on KYC-only platforms feels increasingly uncomfortable.
With a non-custodial, no-KYC swap tool like SwapRocket, you can still move between coins and chains without handing over your identity.
3. Withdrawal limits, freezes, and arbitrary rules
CEXs can and do:
- Impose daily or monthly withdrawal limits
- Freeze funds for "reviews" that last weeks
- Block certain coins, networks, or countries overnight
Even if the exchange is honest, you’re still at the mercy of policies, compliance teams, and support queues.
Self-custody flips this dynamic: once your assets are in your own wallet, no one needs to "approve" a transaction.
4. Outages during volatility
When markets move violently, centralized platforms are notorious for going down.
If you:
- Need to swap ETH to USDT quickly to lock in gains
- Want to rotate BTC into stablecoins or back again
- Prefer to move out of risky alts during a crash
…a CEX outage can cost a lot more than just nerves. With non-custodial swaps, you still depend on networks, but you’re not waiting in an exchange support line.
---
What “Full Self-Custody” Actually Means

Before you leave CEXs, you need a clear picture of where you’re going.
"Self-custody" often gets used vaguely, so let’s define it precisely.
Self-custody: you hold the keys, period
You’re in full self-custody when:
- Your crypto sits in wallets where you control the private keys or seed phrase
- No centralized party can freeze, confiscate, or limit your withdrawals
- You can sign transactions directly, from your own device or hardware
That usually means using:
- Hardware wallets (Ledger, Trezor, etc.) for larger or long-term holdings
- Software or mobile wallets (e.g., MetaMask, Phantom, Sparrow, etc.) for more active use
- Sometimes a mix of both – hardware for cold storage, software for active trading and DeFi
Non-custodial, no-KYC swap tools like SwapRocket plug into this setup: you connect from your own wallets, swap quickly, and never deposit funds into a centralized account.
Wallet types and what they’re good for
You don’t need to be a tech expert – but you do need the right tools for each job.
- Bitcoin (BTC): Use a Bitcoin-focused wallet (Sparrow, BlueWallet, hardware wallets).
- Ethereum & EVM chains (ETH, USDT, USDC, BNB, etc.): Use MetaMask or hardware wallets with EVM support.
- Solana (SOL, SOL-based USDC/USDT): Use Phantom, Solflare, or a hardware wallet that supports SOL.
- Privacy coins (like XMR): Use official or reputable Monero wallets, then swap via routes like BTC to XMR for more privacy.
If you’re unsure which networks or coins you’ll be using, check SwapRocket’s supported cryptocurrencies list to see what you can easily swap between.
The one rule: protect your seed phrase
Every serious wallet gives you a seed phrase (12–24 words). That’s the master key.
- If someone else gets it, they can take everything in that wallet.
- If you lose it, no one can help you recover your funds – there’s no "forgot password".
Write it on paper (or metal), keep multiple offline backups, and never store it in plain text on your phone, email, or cloud.
---
How to Plan Your Exit from CEXs Safely
Leaving CEXs is not an all-or-nothing overnight move. The smoothest exits are planned.
Think of it like moving apartments: you don’t throw everything in a single trash bag at 2 a.m. You plan, pack, label, and double-check.
Step 1: Take inventory of your current CEX holdings
Log into your exchange and list:
- Which coins and tokens you hold (BTC, ETH, SOL, XRP, USDT, etc.)
- Which networks they’re on (e.g., USDT-ERC20 vs USDT-TRC20 vs USDT-SOL)
- The approximate amounts and values (even rough numbers help you prioritize)
This matters because:
- Some chains have very low fees (SOL, TRX, BNB Smart Chain)
- Others are more expensive (Ethereum mainnet during busy periods)
- You might want to consolidate or swap before withdrawing to save on fees
Step 2: Decide what you actually want to hold
Self-custody forces a useful question: What do I want to own long-term?
Maybe that’s:
- A core stack of BTC and ETH
- Some SOL or BNB for DeFi and faster chains
- A chunk of stablecoins (USDT/USDC) for dry powder
If you already know you’ll want more stable exposure, it can be smart to convert some assets before or after withdrawal.
- On a CEX, you might do simple spot trades.
- Once you’re in self-custody, you can use SwapRocket’s converter to do things like ETH to USDT or BTC to USDT privately, without re-depositing to a KYC exchange.
If you want a deep dive on when swapping to stablecoins makes sense, check out the BTC to USDT Guide: Fast, Private Swaps Explained.
Step 3: Choose your wallet setup
You don’t need one wallet for everything – in fact, that’s often a bad idea.
A practical setup for many traders:
- Cold storage wallet: Long-term BTC and ETH, maybe some stables. Use a hardware wallet, and rarely move funds.
- Hot or mobile wallet: Smaller amounts for regular swaps and DeFi.
- Chain-specific wallets: One for Solana, one for Bitcoin, etc., so UI stays simple.
Whatever you choose, test each wallet with tiny amounts before sending serious money.
Step 4: Plan a phased exit, not a one-shot move
Instead of trying to move everything in one day:
- Withdraw a small test amount from your CEX to each wallet.
- Confirm it arrives, you can see it, and you control it.
- Then start moving larger portions in batches.
This way, if you:
- Use the wrong address format
- Pick the wrong network
- Copy-paste incorrectly
…you’ll discover it with $10 on the line, not your entire net worth.
---
CEX vs Self-Custody + SwapRocket: What Actually Changes?
Before we jump into the step-by-step, it helps to see the trade-offs clearly.
With self-custody + a non-custodial swap tool, you keep the convenience of fast conversions (like SOL to USDT or ETH to USDT) without giving up control.
---
Step-by-Step: Moving to Full Self-Custody with SwapRocket
Let’s put it all together in a concrete flow you can actually follow.
1. Set up and secure your wallets
For each major asset/chain you hold on CEX:
- Create or initialize the appropriate wallet (BTC wallet, EVM wallet, SOL wallet, etc.).
- Back up the seed phrase offline, in at least two physical locations.
- Lock down your devices: OS updates, password manager, and 2FA where relevant.
Consider splitting by time horizon:
- Long-term bags: BTC, ETH, bigger USDT stacks → hardware wallet.
- Active funds: Smaller balances you’ll swap more often → hot wallet.
2. Withdraw from your CEX in stages
Now you’ll start moving funds from the exchange into wallets you control.
For each coin:
- Double-check the network you’re withdrawing on.
- Copy your wallet address carefully.
- Send a small test transaction first.
- Wait for confirmations, verify the transaction on a blockchain explorer.
- Then move larger chunks.
Examples:
- BTC → your Bitcoin wallet, then later you can swap BTC to ETH via BTC to ETH on SwapRocket if needed.
- ETH and ERC-20 USDT → your Ethereum/EVM wallet.
- SOL → your Solana wallet; later you can use Sol to ETH or SOL to USDT converter when you want to rebalance.
If your CEX charges brutal withdrawal fees on certain networks, you might:
- Swap into a cheaper network (e.g., ERC-20 USDT → TRC-20 or SOL-based USDT) on the CEX,
- Withdraw on the cheaper chain,
- Then later use SwapRocket’s converter to move into your preferred assets and chains.
3. Rebalance your portfolio with non-custodial swaps
Once your assets live in your own wallets, you still need to adjust positions over time.
This is where non-custodial swaps help:
- Go to SwapRocket Exchange.
- Choose what you’re swapping from and to (e.g., ETH → USDT, BTC → USDT, SOL → ETH).
- Enter the amount and destination address (your own wallet on the target chain).
- Swap directly from your wallet – no account, no deposit balance, no KYC.
Some concrete examples:
- ETH to USDT: Want to derisk some ETH gains into stablecoins? Use the ETH to USDT route instead of going back to a CEX.
- BTC to USDT: Prefer to park profits in USDT? The BTC to USDT converter lets you do that while staying in self-custody.
- SOL to USDT or ETH: Rotate Solana profits into stablecoins or Ethereum with tools like Sol to ETH or SOL to USDT.
SwapRocket aggregates liquidity sources to offer competitive rates across 200+ coins, with typical swap times measured in minutes.
You can always sanity-check how these swaps work in more detail in the Leaving CEXs for Self-Custody: Complete Swap Guide.
4. Keep fiat on- and off-ramps separate
Eventually, you’ll want to move between crypto and fiat.
A healthy self-custody setup often looks like:
- Your self-custody wallets: where your assets actually live.
- A temporary on/off-ramp: when you need to buy or sell using bank cards, wires, or local payment methods.
You can explore options via SwapRocket’s Buy Crypto and Sell Crypto pages, depending on what’s available in your region.
The key principle: keep your main holdings in self-custody and treat any CEX or fiat ramp as a temporary bridge, not long-term storage.
---
Common Mistakes When Leaving CEXs (And How to Avoid Them)
There are a few painful mistakes that come up again and again. They’re all avoidable if you slow down.
Mistake 1: Sending on the wrong network
Example: withdrawing USDT-ERC20 from your CEX to a TRC-20-only wallet address, or sending Solana tokens to an Ethereum address.
This is often irreversible.
How to avoid it:
- Always confirm that the withdrawal network on the CEX matches what your wallet supports.
- Do small test withdrawals first.
- Use block explorers to verify you’re on the chain you think you’re on.
Mistake 2: Treating your seed phrase casually
Screenshots, cloud backups, notes apps – these feel convenient in the moment and catastrophic later.
How to avoid it:
- Never type your seed phrase into any website or online form.
- Store it offline only (paper, metal plates).
- Use at least two geographically separated backups.
Mistake 3: One giant move "to get it over with"
Rushing a full portfolio withdrawal in one transaction is like driving a sports car for the first time at 200 km/h.
How to avoid it:
- Move in batches.
- Start with smaller, less important amounts.
- Learn and adjust before moving the majority of your holdings.
Mistake 4: Staying dependent on CEXs for every swap
Some traders withdraw to self-custody – then keep sending funds back to CEXs whenever they want to swap coins.
That reintroduces:
- KYC friction
- Withdrawal limits
- Counterparty risk
How to avoid it:
- Use non-custodial swap tools like SwapRocket Exchange so you can do BTC to ETH, ETH to USDT, SOL to ETH, and more directly from your own wallets.
- Bookmark the converter for quick checks on routes and approximate outputs.
For a more detailed migration checklist, you can also read Leaving CEXs: Step‑by‑Step Guide to Full Self-Custody.
---
A Realistic Example: Exiting a CEX Portfolio
Let’s make this concrete with a fictional but realistic setup.
You currently hold on a CEX:
- 0.5 BTC
- 5 ETH
- 300 SOL
- 8,000 XRP
- 20,000 USDT (mixed between ERC-20 and TRC-20)
You decide: "I want to be fully in self-custody within a month."
Week 1: Set up wallets and test
You:
- Buy a hardware wallet and set it up for BTC and ETH.
- Install a SOL wallet (e.g., Phantom) and a mobile wallet for quick EVM access.
- Back up seed phrases carefully.
Then you test:
- Withdraw 0.01 BTC to your BTC wallet.
- Withdraw 0.1 ETH to your EVM wallet.
- Withdraw 5 SOL and 200 USDT (TRC-20) to appropriate wallets.
You verify all of them via block explorers.
Week 2: Move core holdings
Once tests are successful, you:
- Withdraw the remaining 0.49 BTC and 4.9 ETH to your hardware wallet.
- Move 250 SOL to your SOL wallet, leaving 50 SOL on the CEX for final tweaks.
- Withdraw most of your USDT on the cheapest available networks with reasonable liquidity.
You keep track of network fees and move in a few batches instead of one huge shot.
Week 3: Rebalance via non-custodial swaps
Now everything’s in your control, but your allocation isn’t quite what you want.
You decide on a target:
- 60% BTC & ETH
- 25% stablecoins (USDT/USDC)
- 10% SOL
- 5% "other" (including XRP)
You take action from your self-custody wallets using SwapRocket:
- Swap some ETH to USDT using the ETH to USDT swap route.
- Convert a portion of BTC to USDT via the BTC to USDT converter to hit your stablecoin target.
- Optionally rotate some SOL to ETH using Sol to ETH if SOL ran harder than ETH and you want to rebalance.
Each swap happens straight from your wallet; you never re-deposit onto a CEX.
Week 4: Clean up and simplify
Finally, you:
- Decide whether to keep or trim XRP (maybe convert some XRP to USDT via SwapRocket if liquidity and routes look good).
- Consolidate small dust balances (tiny amounts of different tokens) into one or two main assets via SwapRocket’s converter.
- Double-check all backups, label wallets, and document your process for your future self.
At the end of the month:
- Your coins live entirely in wallets you control.
- You’re not relying on any exchange withdrawals.
- You can swap between BTC, ETH, SOL, USDT, and more in minutes, with no KYC, using SwapRocket.
---
Tools & Resources for a Smooth Transition
You don’t have to figure everything out from scratch.
Here are some useful places to keep handy while you exit CEXs:
- SwapRocket Exchange: For fast, non-custodial swaps between 200+ coins – start here: Exchange.
- Crypto Converter: To quickly estimate outputs for pairs like ETH to USDT, SOL to USDT, or BTC to USDT: Converter.
- FAQ: Common questions on limits, timing, supported chains, and safety: FAQ.
- Supported Cryptocurrencies: Check if a coin you hold can be swapped directly: Supported Cryptocurrencies.
- About & Reviews: Want to understand who’s behind SwapRocket and what other users say? See About and Reviews.
- Contact: If you’re planning a large portfolio move and want clarification, reach out via Contact.
For deeper reading specifically about leaving exchanges and building a self-custody setup, the blog has detailed walkthroughs like:
- Leaving CEXs for Self-Custody: Complete Swap Guide
- Leaving CEXs: Step‑by‑Step Guide to Full Self-Custody
You can also browse more topics anytime from the main Blog.
---
Related Reading
If you found this guide useful, these articles will help you go even deeper:
- Leaving CEXs for Self-Custody: Complete Swap Guide
- Leaving CEXs: Step‑by‑Step Guide to Full Self-Custody
- BTC to USDT Guide: Fast, Private Swaps Explained
---
Ready to Leave CEXs? Make Your First Self-Custody Swap
Moving off centralized exchanges isn’t about paranoia. It’s about aligning your setup with what crypto was built for: you actually owning your money.
The path is straightforward:
- Set up and secure your wallets.
- Withdraw from CEXs in small, careful steps.
- Rebalance and convert using non-custodial, no-KYC swaps.
If you’re ready to take the next step, start by checking the routes and rates for the assets you actually hold:
- Explore swap routes on the Exchange page.
- Use the converter to see how much you’d get moving, say, ETH to USDT or BTC to USDT.
- Keep the FAQ open in another tab if you want extra clarity.
You don’t have to move everything today. But you can start with one wallet, one test withdrawal, and one private swap on SwapRocket.
From there, each step away from centralized exchanges is a step toward genuine self-sovereignty over your crypto.