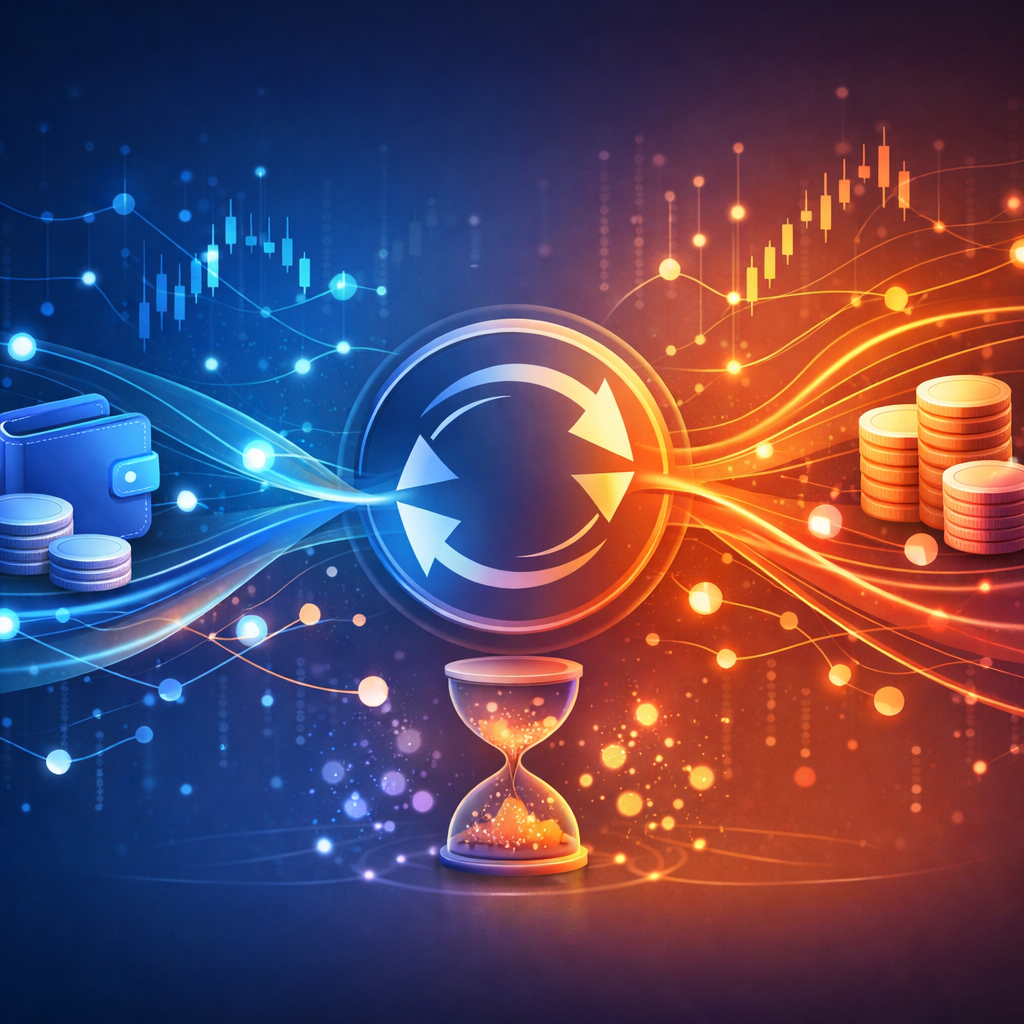
Sua primeira troca de criptografia: passo a passo para iniciantes
Um passo a passo completo para iniciantes em sua primeira troca de criptografia sem custódia e sem KYC - passo a passo, com exemplos reais e dicas para economizar taxas.

| Recurso | Swap sem custódia (SwapRocket) | Bolsa centralizada (CEX) |
|---|---|---|
| Controle de fundos | Você mantém a custódia (sua carteira) | Exchange mantém fundos em sua conta |
| KYC | Normalmente sem KYC | Frequentemente exigido (ou exigido posteriormente) |
| Velocidade | Geralmente minutos | Negociação rápida, mas depósitos/saques podem atrasar |
| Privacidade | Superior (menos dados pessoais) | Inferior (identidade + atividade vinculada) |
| Perfil de risco | Erros de endereço/rede | Congelamento de conta, retenção de retirada, bloqueio KYC |
É um pouco como a primeira vez que você usa um caixa eletrônico em um país estrangeiro: você está animado, um pouco nervoso e pensando: “Se eu pressionar o botão errado… meu dinheiro acabará para sempre?”
Aqui está a boa notícia: um swap sem custódia é uma das maneiras mais seguras de trocar criptografia porque você não está entregando seus fundos a uma conta de câmbio centralizada que pode congelar, atrasar ou exigir KYC no pior momento.
Este passo a passo foi desenvolvido para iniciantes. No final, você saberá exatamente em que clicar, o que verificar e como evitar os erros clássicos que custam tempo (e às vezes dinheiro) às pessoas.
Panorama do mercado (janeiro de 2026): os preços mudam rapidamente e as taxas variam de acordo com o congestionamento da rede. Este guia não depende de taxas em tempo real – seu objetivo é aprender o processo e se proteger independentemente das condições do mercado.
TL;DR: Sua primeira troca em 10 minutos
Se você quer apenas um manual rápido, aqui está.
Sua primeira troca sem custódia (versão simples):
- Escolha o que você está enviando e o que deseja receber (exemplo: ETH → USDT).
- Cole o endereço da carteira de recebimento (onde a nova moeda deve chegar).
- Gere um swap e envie o valor exato para o endereço fornecido.
- Aguarde as confirmações (geralmente alguns minutos; às vezes mais durante o congestionamento).
- Receba sua nova moeda em sua carteira – pronto.
Verificações de segurança para iniciantes (faça sempre):
- Confirme que você está na rede certa (ERC-20 vs TRC-20 vs BEP-20 é importante).
- Copie/cole endereços – não os digite.
- Comece com uma pequena troca de teste se estiver nervoso (por exemplo, US$ 20 a US$ 50).
- Espere dois tipos de taxas: spread de plataforma + taxas de rede.
Quer fazer isso agora? Vá para a página de troca do SwapRocket: /exchange.
Por que sua primeira troca parece assustadora (e por que não deveria)
A maioria das “histórias de cripto-horror” vem de duas coisas:
- Pessoas enviando moedas para a rede errada
- Pessoas que confiam no intermediário errado
SwapRocket é sem custódia, o que significa que você não deposita fundos em uma conta “de propriedade” da bolsa. Você está trocando diretamente da sua carteira e controla suas chaves o tempo todo.
Também é sem KYC, o que significa que normalmente você pode trocar sem fazer upload de ID, aguardar aprovações ou ficar preso em um ciclo de “verificação pendente”.
Se você é novo, essa combinação é o ponto ideal:
- Menos aros
- Menor exposição de dados pessoais
- Um fluxo mais simples e limpo
Se você está curioso para saber como é a “privacidade em primeiro lugar” além de apenas não-KYC, você vai gostar deste guia mais profundo: Privacy-First-crypto-swaps: guia completo para trocas anônimas e sem KYC (2025).
Antes de trocar: 3 coisas para configurar (para não entrar em pânico depois)
Vamos ter certeza de que você não está tentando construir o avião enquanto ele está decolando.
1) Você precisa de uma carteira que possa receber a moeda que você deseja
Se estiver trocando por USDT, por exemplo, você precisa de uma carteira que suporte USDT na rede que planeja receber.
Uma regra para iniciantes: escolha uma rede e siga-a até se sentir confortável.
- ETH/ERC-20 é amplamente suportado, mas pode ser mais caro durante congestionamentos.
- Tron / TRC-20 costuma ser mais barato para stablecoins como USDT, mas nem todas as carteiras suportam Tron por padrão.
2) Você precisa de um pouco mais para taxas de rede
Mesmo quando você troca “toda” uma moeda, as redes ainda precisam de taxas.
Exemplos:
- O envio de ETH no Ethereum requer ETH para gás.
- O envio de SOL no Solana requer uma pequena quantia de SOL para taxas.
Para a sua primeira troca, deixe uma pequena almofada:- O valor de US$ 5 a US$ 20 na moeda de envio geralmente é suficiente para a maioria das trocas para iniciantes (varia de acordo com a rede).
3) Saiba a diferença: “conversor” vs “troca”
Isso confunde as pessoas.
- Um conversor ajuda a estimar valores e comparar pares.
- Uma troca de troca é onde você realmente executa a troca.
No SwapRocket, você pode visualizar pares no /converter e então executar a troca real em /exchange.
Se você quiser uma verificação rápida dos pares populares, experimente estas calculadoras:
- Conversor SOL para USDT: /converter/sol/usdt
- Conversor BTC para USDT: /converter/btc/usdt
Uma comparação rápida: swap sem custódia vs exchange centralizada

Quando você é novo, pode se perguntar: “Por que não usar apenas um grande aplicativo de troca?”
Às vezes tudo bem. Mas aqui está o que você está negociando.
A questão não é que alguém seja “sempre melhor”.
É que para uma primeira troca – especialmente se você valoriza a privacidade e a simplicidade – as trocas sem custódia são uma rampa de acesso simples.
Passo a passo: Faça sua primeira troca sem custódia (exemplo real)
Vamos percorrer o fluxo exato que a maioria dos iniciantes faz.
Exemplo de swap: ETH → USDT (um movimento clássico de “dormir à noite”)
Você comprou ETH, bombeou um pouco e agora quer estacionar valor em USDT.
Essa é uma das trocas para iniciantes mais comuns na Internet e também é uma oportunidade de palavra-chave por um motivo: as pessoas fazem isso todos os dias.
Você pode ir direto para a página ETH para USDT do SwapRocket aqui: /exchange/eth-to-usdt.
#### Etapa 1: Abra a página de troca
Vá para /exchange e selecione:
- Você envia: ETH
- Você recebe: USDT
Se você ainda estiver decidindo, use /converter primeiro para verificar a matemática.
#### Etapa 2: Escolha suas redes com cuidado
Este é o lugar número 1 para iniciantes.
O USDT existe em várias redes. O endereço da sua carteira deve corresponder à rede selecionada.
Modelo mental rápido:
- Pense na rede como um “sistema postal”.
- Um endereço funciona apenas dentro do seu próprio sistema postal.
Se você selecionar USDT no Ethereum (ERC-20), deverá colar um endereço de recebimento ERC-20 USDT.
Se você selecionar USDT no Tron (TRC-20), deverá colar um endereço de recebimento Tron USDT.
Em caso de dúvida, abra sua carteira e verifique a etiqueta exata da rede.
#### Passo 3: Cole seu endereço de recebimento (devagar aqui)
Este é o momento de ser calmo e metódico.
- Copie o endereço de recebimento do USDT da sua carteira
- Cole no SwapRocket
- Verifique novamente os primeiros 4 e os últimos 4 caracteres
Dica profissional: se você estiver trocando uma grande quantia, faça primeiro uma troca de teste.
Um valor comum de teste de “primeira vez” é de $20–$50. Custa um pouco em taxas, mas traz tranquilidade.
#### Passo 4: Confirme a cotação e entenda o que pode mudar
Dependendo do tipo de swap e do movimento do mercado, o valor final recebido pode variar ligeiramente.
Isso é normal.
Os dois principais motivos:
- As taxas de rede mudam com o congestionamento
- O preço se move entre o momento em que você começa e o momento em que a troca é concluídaSe você quiser uma compreensão mais profunda do que “taxas” realmente significam (e por que “swaps gratuitos” geralmente são marketing), leia: Swap criptográfico gratuito? Compreendendo como as taxas de câmbio realmente funcionam.
#### Passo 5: Envie o valor exato para o endereço fornecido
SwapRocket mostrará um endereço de depósito para o qual enviar seu ETH.
Agora você faz o lado da carteira:
- Abra sua carteira
- Cole o endereço de depósito
- Envie o valor exato solicitado
Duas regras para iniciantes:
- Não envie de uma exchange a menos que você entenda as regras e memorandos de retirada.
- Não “arredondar”, a menos que a troca permita explicitamente.
#### Etapa 6: Aguarde as confirmações (não entre em pânico)
Após o envio, a rede precisa de confirmações.
Dependendo do tráfego da cadeia, isso pode levar:
- Alguns minutos em muitas redes
- Mais tempo durante o congestionamento
A maioria das pessoas se sabota aqui fazendo algo desnecessário:
- Reenvio de fundos
- Iniciando uma segunda troca
- Alterar configurações no meio do processo
Se a página de status de troca mostrar que está aguardando confirmações, a melhor atitude geralmente é… esperar.
#### Etapa 7: Receba USDT em sua carteira
Assim que a troca for concluída, o USDT chega ao seu endereço de recebimento.
Se você não vê-lo instantaneamente, verifique:
- Você está visualizando a rede certa em sua carteira
- Você adicionou o token (algumas carteiras exigem a adição manual de USDT)
- Você está verificando o mesmo endereço que colou
É isso. Sua primeira troca está concluída.
Outro exemplo para iniciantes: SOL → ETH (porque todo mundo pesquisa no Google)
Muitas pessoas aprendem primeiro as trocas tentando conversões entre cadeias.
Talvez você tenha SOL e queira cunhar algo no Ethereum. Ou você deseja apenas consolidar ativos.
SwapRocket tem uma página dedicada para este par: /exchange/sol-to-eth.
Aqui está a pegadinha do iniciante:
- Você está enviando SOL em Solana
- Você está recebendo ETH no Ethereum
Isso significa que você pagará:
- Uma pequena taxa de rede Solana no envio
- Uma taxa de swap/serviço/spread incluído na cotação
- Mais tarde, você poderá pagar o gás Ethereum ao usar o ETH
Não é “ruim”. É apenas a realidade da multi-cadeia.
O que os iniciantes costumam errar (e como evitá-lo)
Esta seção economizará mais dinheiro do que qualquer “estratégia de negociação”.
Erro nº 1: escolher a rede errada para stablecoins
USDT é o exemplo clássico.
As pessoas trocam para o USDT, colam o tipo errado de endereço e depois se perguntam por que nada aparece.
Correção:
- Combine a rede com o endereço.
- Se sua carteira disser “USDT (TRC-20)”, seu endereço deverá ser TRC-20.
Erro nº 2: não deixar dinheiro para gasolina
Se você tentar enviar todo o seu saldo de ETH, poderá não ter sobra suficiente para o gás.
Correção:
- Deixe uma pequena almofada.
- Se não tiver certeza, troque um pouco menos do que seu saldo total.
Erro nº 3: enviar de um CEX sem entender o comportamento de retirada
Às vezes, trocas centralizadas:
- Retiradas em lote
- Atrasar retiradas
- Exigir confirmações extras
- Use tempos de processamento interno que pareçam “nada está acontecendo”
Correção:
- Para sua primeira troca, envie de uma carteira de autocustódia, se possível.
Erro nº 4: cair em taxas “boas demais” sem verificar o custo total
O preço de etiqueta não é o preço final.
Seu custo real inclui:
- Taxas de rede
- Diferença de spread/taxa
- Qualquer carteira extra ou taxas de câmbio
Se você quiser uma análise prática de onde os swaps ficam caros, leia: Taxas de swap de criptografia: custos ocultos que comem seu lucro.
Sua lista de verificação para iniciantes (imprima mentalmente)
Antes de clicar em “Trocar”, execute esta lista rápida.
A verificação pré-voo de 60 segundos- [] Selecionei o par de moedas correto (enviar vs receber)
- [] Meu endereço de recebimento corresponde à rede selecionada - [ ] Copiei/colei o endereço e verifiquei os primeiros/últimos 4 caracteres - [] Estou deixando o suficiente para taxas de rede - [ ] Estou confortável com o valor e o prazo estimadosA versão “Sou extremamente cauteloso”
- [ ] Estou fazendo uma troca de teste de US$ 20 a US$ 50 primeiro
- [] Tirei uma captura de tela da página de detalhes da troca (para referência)
- [ ] Tenho o ID da transação (txid) pronto se precisar de suporte
Onde o SwapRocket se encaixa (e por que os iniciantes gostam dele)
Quando você é novo, a melhor ferramenta é aquela que você realmente usará corretamente.
SwapRocket é construído em torno de uma ideia simples: a troca deve ser semelhante ao envio de criptografia, não como a abertura de uma conta de corretora.
O que você ganha:
- Trocas sem custódia: você mantém o controle de suas chaves
- Fluxo sem KYC: privacidade em primeiro lugar por padrão
- Trocas rápidas: normalmente minutos para muitos pares
- Taxas competitivas: agregação de liquidez entre provedores
- Mais de 200 criptomoedas suportadas: muito espaço para crescer
Você também pode verificar o que está disponível antes de começar aqui: /supported-cryptocurrencies.
Se você é novo no SwapRocket e quer saber “quem são essas pessoas?” página, comece em /about ou dê uma olhada em /reviews.
Respostas no estilo FAQ que os iniciantes realmente precisam
“Um swap sem custódia é o mesmo que um DEX?”
Não exatamente.
Um DEX geralmente significa contratos inteligentes on-chain e pools de liquidez on-chain.
Uma plataforma de swap instantâneo sem custódia como o SwapRocket concentra-se em um fluxo de swap guiado onde você não abre uma conta ou deposita fundos em uma carteira de câmbio.
“Quanto tempo deve demorar minha primeira troca?”
Geralmente de 5 a 20 minutos para pares comuns, dependendo de confirmações de rede e congestionamento.
Se uma rede estiver ocupada, pode demorar mais. Isso não significa automaticamente que algo está errado.
“E se eu precisar de ajuda no meio da troca?”
Seu melhor amigo é o ID da transação (txid) da sua carteira de envio.
Em seguida, acesse /faq para problemas comuns e próximas etapas, ou use /contact se tiver dúvidas.
Um mini-manual para iniciantes: três primeiras trocas que fazem sentido
Se você não tiver certeza do que tentar primeiro, essas são as trocas populares de “rodas de apoio”.
1) ETH → USDT (reduz a volatilidade)
Perfeito quando você deseja obter lucro ou pausar o risco.
Tente: /exchange/eth-to-usdt
2) BTC → ETH (passar de reserva de valor para utilidade)
BTC é “ouro digital”. ETH é “óleo digital” para aplicativos.
Tente: /exchange/btc-to-eth
3) BTC → XMR (holding com foco na privacidade)
Isso é comum para pessoas que estão aprendendo a autocustódia que prioriza a privacidade.
Tente: /exchange/btc-to-xmr
Se você quiser se aprofundar na mudança privada (sem transformá-la em uma espiral de paranóia), este guia vale seu tempo: Privacy-First Crypto Playbook: Move Funds Anonymously.
Sua primeira troca, mas mais inteligente: como evitar pagar a mais
Uma troca é simples – mas você ainda pode fazer isso de forma “inteligente”.
Escolha a hora certa do dia (sim, é importante)
As taxas podem aumentar quando as redes estão ocupadas.
Você não precisa ficar obcecado, mas se for flexível, tente trocar quando sua corrente estiver mais calma.
Compare usando o conversor antes de confirmar
Use /converter para verificar a integridade dos valores.
Se você estiver usando stablecoins, estes conversores rápidos são úteis:
- /conversor/btc/usdt
- /conversor/sol/usdt
Mantenha o tédio na sua primeira corrida
Sua primeira troca não é hora para:
- fichas exóticas
- pequenas moedas ilíquidas
- rotas complexas de vários saltos
Comece com as principais (BTC, ETH, SOL, USDT), fique confortável e depois expanda.
Leitura Relacionada (continue aprendendo sem ficar sobrecarregado)
- Se você quiser subir de nível após sua primeira troca, estas são as melhores próximas leituras:- [Privacy-First-crypto-swaps-no-kyc-complete-guide]
- Troca de criptografia grátis? Compreendendo como as taxas de câmbio realmente funcionam
- Privacy-First-crypto-playbook-move-funds-anonymously
Pronto para fazer sua primeira troca?
Se você leu até aqui, já está à frente da maioria dos novatos.
Abra /exchange, escolha seu par e faça um pequeno teste de troca primeiro se quiser confiança extra. Em alguns minutos, você perceberá que a parte “assustadora” não foi a troca – foi a incerteza.
Troque em particular. Troca sem custódia. Troque como se você realmente controlasse seu dinheiro.
Comece sua primeira troca no SwapRocket: /exchange